A. The Imperative of Linux Server Security in a Threat-Filled Digital World
Linux powers the vast majority of the internet’s infrastructure, from cloud servers and web applications to embedded systems and supercomputers. Its reputation for stability and security is well-earned, but it is not inherent. A default Linux installation is a vulnerable one, presenting a wide attack surface for malicious actors. The process of systematically securing this operating system is known as Linux Server Security Hardening—a critical discipline that transforms an exposed system into a fortified digital fortress. This comprehensive guide delves into the essential practices, tools, and methodologies required to protect your Linux servers from unauthorized access, data breaches, and other cyber threats. We will move beyond basic tips to provide a deep, actionable framework for building a robust security posture, covering everything from initial setup and user management to advanced mandatory access controls and continuous monitoring.
In an era where a single security lapse can lead to catastrophic data loss, financial damage, and irreparable reputational harm, assuming a proactive stance is not optional; it is a fundamental responsibility for every system administrator, developer, and business owner. This article will serve as your definitive manual, providing a layered defense strategy that addresses security at the network, service, and filesystem levels, ensuring your Linux servers remain resilient against an ever-evolving threat landscape.
B. Foundational Principles of Server Hardening
Before diving into specific commands and configurations, it is crucial to understand the core security philosophies that guide the hardening process.
A. The Principle of Least Privilege (PoLP)
This is the cornerstone of information security. It dictates that every user, process, or system component should be granted only the minimum permissions absolutely necessary to perform its intended function. This limits the potential damage from a compromise, whether accidental or malicious.
B. The Concept of Defense in Depth
Relying on a single security control is a recipe for disaster. Defense in Depth involves implementing multiple, layered security measures so that if one layer is breached, subsequent layers will still provide protection. This guide is structured around this very concept.
C. Reducing the Attack Surface
Every running service, open port, and installed package represents a potential entry point for an attacker. The goal of hardening is to systematically identify and eliminate all non-essential components, thereby shrinking the server’s attack surface to the absolute minimum.
D. Assume a Breach Mindset
Modern security operates on the assumption that determined attackers will eventually find a way in. Hardening, therefore, must also focus on detection, containment, and response—limiting what an attacker can do once they have gained a foothold.

C. Phase 1: Initial Setup and System-Level Hardening
The security of a server is determined from the moment it is provisioned. A meticulous initial setup is paramount.
A. Operating System Selection and Minimal Installation
-
Choose a Reputable Distribution: Opt for a mainstream, well-supported distribution like Ubuntu LTS, CentOS Stream, Rocky Linux, or Debian, which receive timely security updates.
-
Minimal Install: Always select a “Minimal” or “Basic Server” installation option. This ensures that only the core operating system is installed, drastically reducing the number of packages that need to be secured and updated.
B. Systematic Patching and Update Policy
A vulnerable package is the most common attack vector.
-
Automate Security Updates: Configure unattended-upgrades (on Debian/Ubuntu) or dnf-automatic (on RHEL/CentOS) to automatically install security patches.
-
Maintain a Update Schedule: For critical production systems, implement a structured patch management policy that includes testing in a staging environment before deployment.
C. Secure User and Account Management
Human factors are often the weakest link.
-
Avoid Direct Root Login: Never log in directly as the root user.
-
Use Strong Passwords and Policies: Enforce strong password complexity using
pwqualityand set expiration policies withchage. -
Implement Sudo Privileges: Grant administrative access selectively using
sudo. Configure the/etc/sudoersfile carefully, avoidingNOPASSWDdirectives where possible. -
Disable System Accounts: Lock the passwords for non-login system accounts using
usermod -L <username>.
D. Phase 2: Network-Level Hardening and Service Security
Controlling what can communicate with your server is a critical layer of defense.
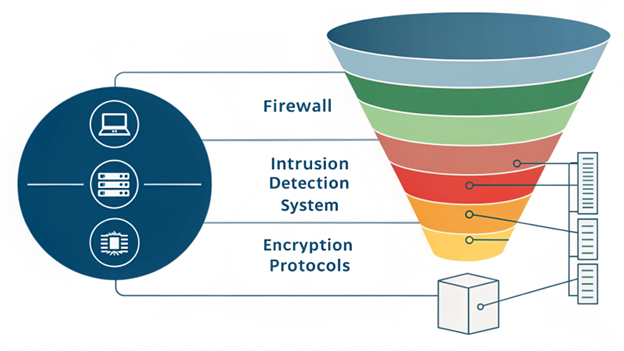
A. Firewall Configuration: The First Line of Defense
A firewall acts as a gatekeeper, blocking all unauthorized network traffic.
-
Default Deny Policy: The foundational rule should be to deny all incoming and outgoing traffic by default.
-
Explicitly Allow Required Services: Only open ports that are absolutely necessary.
-
UFW (Uncomplicated Firewall): For simplicity on Debian/Ubuntu:
sudo ufw enable,sudo ufw allow ssh,sudo ufw allow 80/tcp,sudo ufw allow 443/tcp. -
firewalld: The default for RHEL/CentOS/Rocky Linux. Use
firewall-cmdto manage zones and services. -
Iptables/nftables: For granular, manual control, use iptables or its modern successor, nftables.
-
B. Securing the SSH Service
SSH is the primary entry point for administrators and, consequently, a prime target for attackers.
-
Change the Default Port: Move SSH from port 22 to a non-standard port (e.g., 6022) to reduce the noise from automated bots scanning the internet.
-
Disable Password Authentication: The single most important step for SSH security. Disable password logins and enforce key-based authentication.
# In /etc/ssh/sshd_config
PasswordAuthentication no
PubkeyAuthentication yes
-
Disable Root Login: Prevent the root user from logging in via SSH directly.
PermitRootLogin no
-
Use Strong Key Algorithms: Explicitly specify the key exchange, cipher, and MAC algorithms to use only the most secure modern options.
C. Installing and Configuring Fail2Ban
Fail2Ban is an intrusion prevention framework that dynamically blocks IP addresses showing malicious signs, such as too many failed SSH login attempts.
-
Installation:
sudo apt install fail2banorsudo dnf install fail2ban. -
Configuration: Create a local jail configuration (
/etc/fail2ban/jail.local) to define ban times, find times, and max retries. It can be extended to protect other services like web servers and FTP daemons.
E. Phase 3: Advanced Application and Kernel Hardening
With the basics in place, we now focus on more sophisticated security layers that protect the core of the system.
A. Mandatory Access Control (MAC) Systems
While standard Linux uses Discretionary Access Control (DAC), MAC provides a much stricter policy.
-
SELinux (Security-Enhanced Linux): Default on RHEL/CentOS/Rocky/Fedora. It enforces security policies that define how processes and users can interact with files, directories, and other processes. Run it in
Enforcingmode. -
AppArmor: The default MAC for Debian/Ubuntu. It confines programs to a set of listed files and capabilities defined in profiles. Ensure it is running and enforce profiles for critical services like Nginx and MySQL.
B. Kernel Hardening with Sysctl Parameters
The Linux kernel can be tuned for enhanced security through the /etc/sysctl.conf file.
-
Network Hardening: Disable ICMP redirect acceptance, IP forwarding (if not a router), and log martian packets.
-
Memory Protection: Enable ASLR (Address Space Layout Randomization) and protect against memory corruption attacks.
# Example in /etc/sysctl.conf
net.ipv4.conf.all.accept_redirects = 0
kernel.randomize_va_space = 2
C. Filesystem and Permission Auditing
Incorrect file permissions are a common source of privilege escalation.
-
Audit with Lynis: Run a comprehensive security audit tool like Lynis (
sudo lynis audit system) to identify misconfigurations and security weaknesses. -
Set Strict Umask: A umask of 022 or 027 ensures new files are not created with world-writable permissions.
-
Find World-Writable Files: Regularly scan for and remediate world-writable files and directories:
find / -path /proc -prune -o -type f -perm -0002 -exec ls -l {} \;
F. Phase 4: Proactive Monitoring, Auditing, and Maintenance
Security is not a one-time task but a continuous process of vigilance.
A. Implementing System Auditing with auditd
The Linux Audit Daemon (auditd) provides a powerful way to track security-relevant events on your system.
-
Monitor File Access: Set up watches on critical files and directories like
/etc/passwd,/etc/shadow, and/bin. -
Monitor System Calls: Create rules to log specific system calls, which can help in forensic analysis after a security incident.
B. Log Management and Centralization
Server logs are a goldmine of security information.
-
Review Logs Regularly: Use tools like
journalctl(for systemd) andlogwatchto get daily summaries of system activity. -
Centralize Logs: Do not store logs only on the server itself. Use a central log management solution like the ELK Stack (Elasticsearch, Logstash, Kibana), Graylog, or a commercial SIEM (Security Information and Event Management) to aggregate and analyze logs from all your servers. This prevents an attacker from covering their tracks by deleting local logs.
C. Intrusion Detection with AIDE
AIDE (Advanced Intrusion Detection Environment) is a file and directory integrity checker. It creates a database of file attributes (hashes, permissions, timestamps) and can then be used to verify the integrity of the system and detect any unauthorized changes.
-
Initialization:
sudo aideinit -
Verification:
sudo aide --check
G. A Step-by-Step Hardening Checklist
To synthesize this guide, here is a actionable checklist to follow.
A. Initial Deployment
-
Perform a minimal OS installation.
-
Run a full system update (
apt update && apt upgradeordnf update). -
Create a non-root user with sudo privileges.
-
Configure the firewall to allow only SSH (on a custom port) and other essential services.
B. Core Hardening
-
Harden SSH: disable root login, password authentication, and change the port.
-
Install and configure Fail2Ban.
-
Install and enable AIDE for file integrity checking.
-
Review and disable unnecessary services (
systemctl list-unit-files --type=service).
C. Advanced Hardening
-
Configure and enable SELinux or AppArmor in enforcing mode.
-
Harden kernel parameters via
sysctl. -
Install and run Lynis to identify remaining vulnerabilities.
-
Set up centralized logging.
H. Conclusion: Building an Unbreachable Linux Foundation
Linux server security hardening is a meticulous, multi-layered process that demands diligence and a deep understanding of the system’s inner workings. By methodically applying the principles and techniques outlined in this guide—from the fundamental lockdown of SSH and firewalls to the advanced protection of SELinux and proactive integrity checking with AIDE—you can elevate your server’s security from a default, vulnerable state to a hardened bastion capable of withstanding modern cyber threats.
Remember, security is a journey, not a destination. The threat landscape is dynamic, and so must be your defenses. Regular audits, continuous monitoring, and a commitment to staying informed about new vulnerabilities and hardening techniques are essential for maintaining a robust security posture. By embracing this culture of security, you are not just protecting a server; you are safeguarding the data, trust, and continuity of the entire operation it supports.